Table of Contents
Introduction
Have you ever wondered why your skin feels rough and dry, especially during colder months? If so, you're not alone. According to a study by the American Academy of Dermatology, nearly 30% of individuals experience dry skin during winter, leading to discomfort and a lack of radiance. Fortunately, there’s a simple and delightful solution that caters to both your skin's needs and your desire for a clean beauty routine: an all-natural sugar scrub.
At Moon and Skin, we believe in the power of clean, thoughtful skincare that aligns with our mission to support your skin through every phase of life. Today, we’re diving into the world of DIY sugar scrubs—offering you a step-by-step guide on how to create your own, alongside the benefits of using sugar scrubs, and the best ingredients to incorporate. Our goal is to empower you with knowledge and encourage you to embrace your skin's journey with confidence.
By the end of this blog post, you'll not only know how to make an all-natural sugar scrub, but you'll also understand its benefits, variations, and how to store and utilize it effectively. Let’s embark on this refreshing adventure together!
What is a Sugar Scrub?
Before we dive into the "how-to," let’s explore what a sugar scrub is and why it has become a favorite among skincare enthusiasts.
A sugar scrub is a type of exfoliating product that combines sugar with a carrier oil, allowing for a gentle yet effective way to remove dead skin cells. This process reveals the fresh, radiant skin underneath and helps to maintain a healthy moisture balance. Sugar, particularly, is a natural humectant, meaning it draws moisture into the skin, making it an ideal ingredient for scrubs.
Benefits of Using a Sugar Scrub
- Exfoliation: Sugar granules effectively slough away dead skin cells, leaving your skin smooth and rejuvenated.
- Moisturization: The addition of oils helps to hydrate the skin, preventing dryness and flakiness.
- Easy to Make: With just a few ingredients, you can whip up a batch in minutes, making it a convenient option for self-care.
- Cost-Effective: Creating your own sugar scrub is often more affordable than purchasing commercial products, plus you have complete control over the ingredients.
- Customization: You can tailor your scrub to your preferences, adding essential oils, natural extracts, or even color.
How to Make All Natural Sugar Scrub
Basic Sugar Scrub Recipe
Let’s get started with the basic recipe for an all-natural sugar scrub. This simple formulation requires minimal ingredients and can be easily customized to suit your skin's specific needs.
Ingredients
- 1 cup sugar (white granulated or brown sugar)
- 1/2 cup carrier oil (coconut oil, olive oil, or sweet almond oil)
-
Optional add-ins:
- Essential oils (for fragrance and additional benefits)
- Citrus zest (for a refreshing scent and exfoliation)
- Honey (for added moisture)
Instructions
- Combine Ingredients: In a medium mixing bowl, combine the sugar and carrier oil. Use a spoon or spatula to mix until well-combined. The mixture should resemble a thick paste.
- Add Optional Ingredients: If desired, add a few drops of your favorite essential oil (e.g., lavender for relaxation or peppermint for a refreshing boost) and mix well. You can also incorporate citrus zest for a zesty aroma.
- Store the Scrub: Transfer the mixture into an airtight container, such as a glass jar, and seal tightly. This will help preserve the scrub and keep it fresh.
- Use Your Scrub: In the shower or bath, take a small amount of the scrub and gently massage it onto damp skin in circular motions. Rinse thoroughly with warm water and pat your skin dry. Follow up with your favorite moisturizer for optimal hydration.
Tips for Customization
-
Choosing Your Sugar:
- White Sugar: Ideal for a more coarse scrub that provides effective exfoliation.
- Brown Sugar: Softer and gentler, making it suitable for sensitive skin types.
- Coconut Sugar: A natural alternative that offers additional nutrients.
-
Selecting Your Carrier Oil:
- Coconut Oil: Solid at room temperature; provides deep hydration and a pleasant scent.
- Olive Oil: Rich in antioxidants, it nourishes and moisturizes the skin.
- Sweet Almond Oil: Lightweight and easily absorbed, perfect for all skin types.
-
Enhancing with Essential Oils:
- Lavender: Calming and soothing; perfect for bedtime routines.
- Peppermint: Invigorating and refreshing; ideal for morning use.
- Eucalyptus: Great for a spa-like experience; helps open up the airways.
- Incorporating Natural Exfoliants: For added texture, consider incorporating finely ground coffee, sea salt, or oatmeal, which can enhance the exfoliating properties of your scrub.
- Scents and Aromas: Play around with different combinations of essential oils and natural extracts to create a signature scent that resonates with you.
How to Store Your Sugar Scrub
Proper storage is essential to maintain the quality and effectiveness of your homemade sugar scrub. Here are some tips:
- Airtight Containers: Use glass jars or plastic containers with tight-fitting lids to prevent moisture from entering.
- Cool, Dry Place: Store your scrub in a cool, dry area away from direct sunlight. This will help extend its shelf life.
- Shelf Life: On average, a homemade sugar scrub can last up to 1 month. If you've added fresh ingredients like citrus zest, consider using it within 1-2 weeks.
How to Use Sugar Scrub for Best Results
To maximize the benefits of your sugar scrub, we recommend the following usage tips:
- Frequency: Use your sugar scrub 1-2 times a week for best results. Over-exfoliating can irritate the skin, so moderation is key.
- Application: Apply to damp skin for better absorption. Focus on rough areas like elbows, knees, and feet, where dead skin tends to accumulate.
- Post-Scrub Care: After rinsing off the scrub, apply a moisturizer to lock in hydration and keep your skin feeling soft and smooth.
Benefits of Going Natural
Choosing to make your own all-natural sugar scrub aligns beautifully with our mission at Moon and Skin. We prioritize clean and thoughtful formulations, ensuring your skincare routine is free from toxic ingredients and harmful chemicals. By opting for natural scrubs, you also reduce waste associated with commercial products, contributing to a more sustainable lifestyle.
At Moon and Skin, we encourage you to celebrate your skin’s journey through every phase of life. The beauty of DIY skincare is not just in the results, but in the joy and empowerment that comes from crafting your own products with love.
Conclusion
By following our simple guide on how to make an all-natural sugar scrub, you can elevate your self-care routine and enjoy the myriad benefits of exfoliation and hydration. You now have the tools to create a product that not only cares for your skin but also aligns with your values of clean beauty.
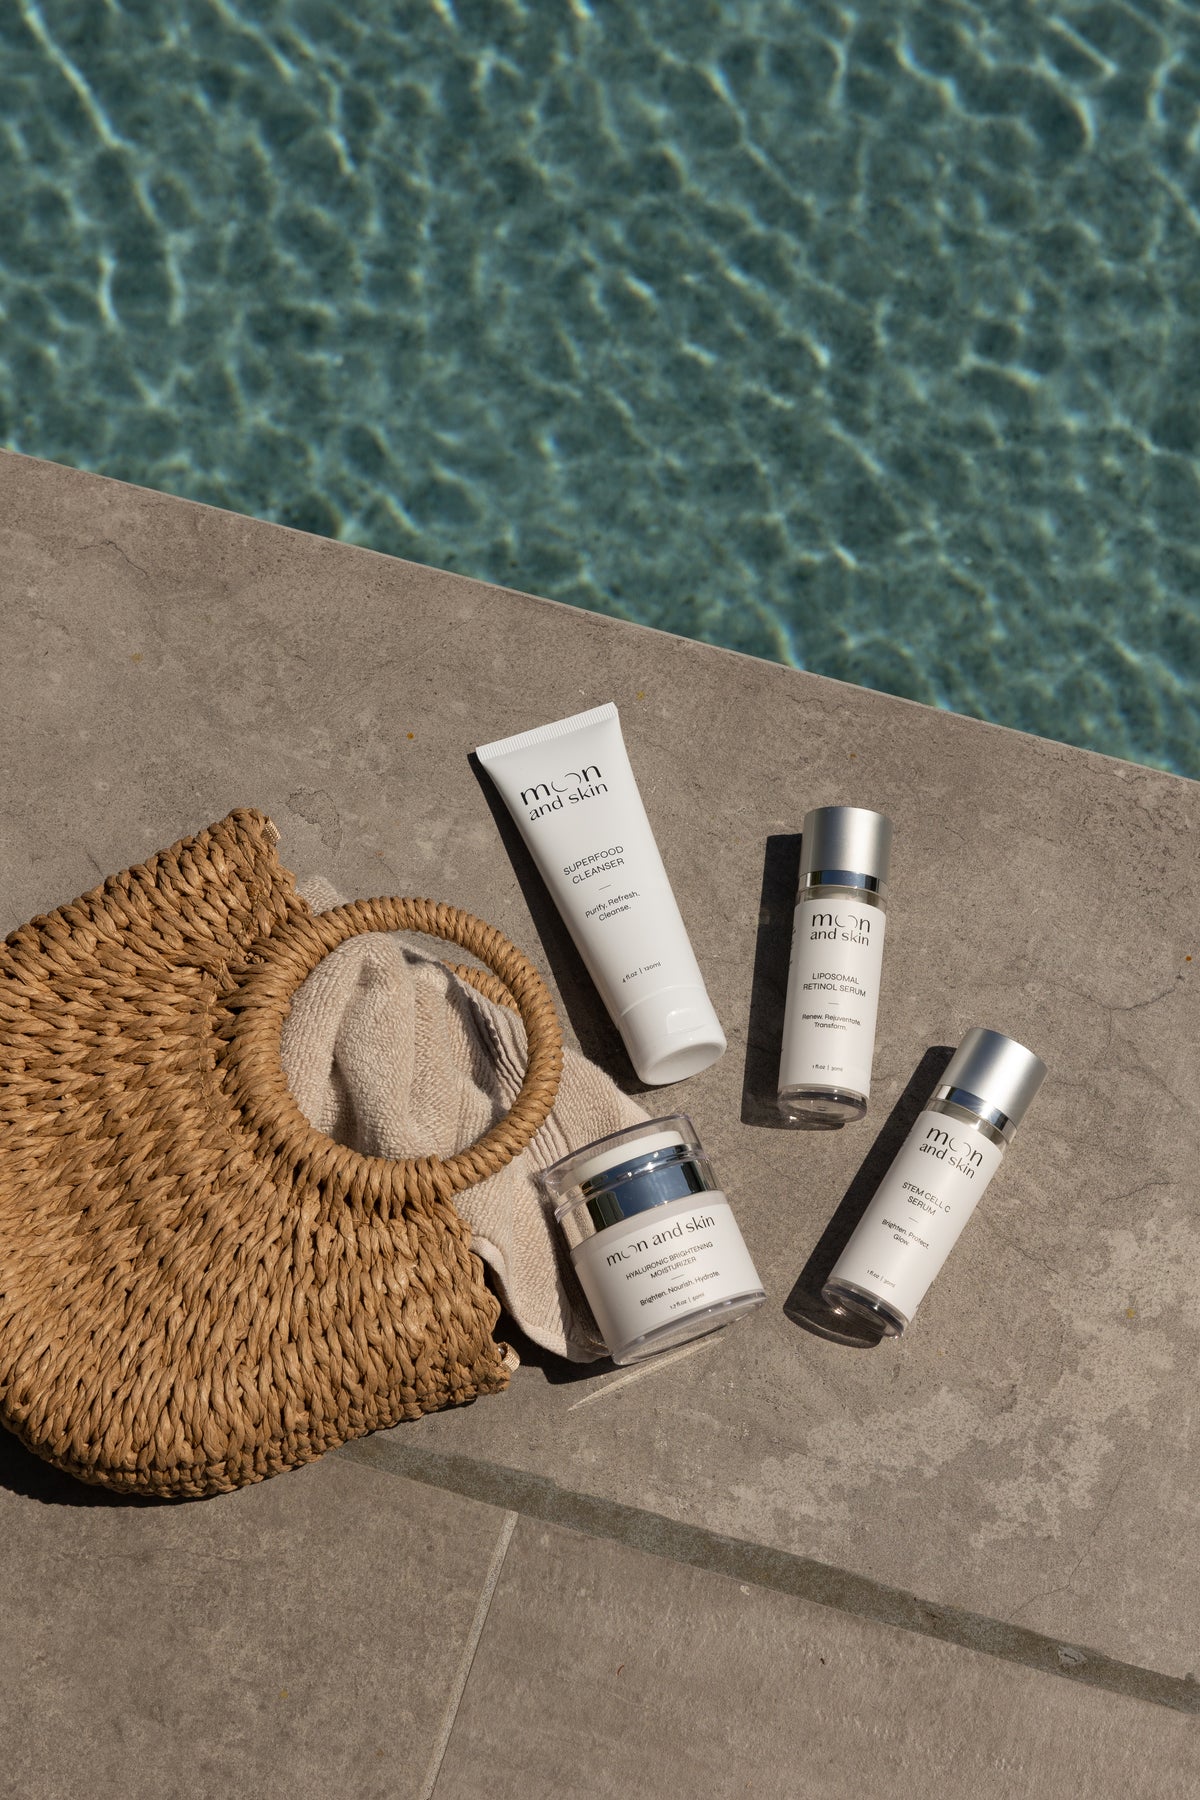
As you explore the world of DIY skincare, consider building a full routine with our Bundle & Save collection, which features our core products crafted with care. From our Superfood Cleanser to the rejuvenating Liposomal Retinol Serum, each product is designed to support your unique skin journey.
Let’s embrace this journey together! Your skin deserves the best, and we’re here to help guide you every step of the way.
FAQ
1. Can I use sugar scrub on my face? Yes, but be cautious! Use a finer sugar, like brown sugar, and apply gently to avoid irritation.
2. How often should I use a sugar scrub? We recommend using it 1-2 times a week to prevent over-exfoliation.
3. How long can I store my homemade sugar scrub? Typically, it lasts up to a month. If you use fresh ingredients, consume it sooner.
4. What if my scrub separates? This is common, especially with oils. Simply stir it before use to recombine the ingredients.
5. Can I gift my homemade sugar scrub? Absolutely! Package it in a cute jar and add a personalized label for a thoughtful gift.
We hope you enjoy making and using your all-natural sugar scrub! If you have any questions or want to share your experience, feel free to reach out. Together, let’s celebrate great skin!