Table of Contents
Introduction
Have you ever looked in the mirror and wished for that radiant, glowing complexion seen in magazine ads? The good news is that achieving beautiful skin doesn't require a trip to a spa or a cabinet full of expensive products. In fact, many effective skincare ingredients are right in your kitchen! Today, we’re diving into the art of creating a homemade skin care routine for glowing skin that emphasizes clean, natural ingredients, aligning perfectly with our commitment to thoughtful skincare at Moon and Skin.
As we navigate through our daily lives, our skin is often subjected to various environmental stressors, from pollution to UV rays, which can cause dullness and premature aging. This is where a well-rounded skincare routine comes in. By harnessing the power of natural ingredients, we can nourish our skin effectively, offering it the care it deserves at every phase of life.
In this blog post, we’ll explore each step of a homemade skincare routine, focusing on cleansing, exfoliating, toning, moisturizing, and protecting your skin. We’ll also highlight how our products at Moon and Skin can complement your homemade routine, ensuring you achieve that coveted glow. Together, we'll create a robust skincare regimen that celebrates the beauty of natural ingredients, while also providing the necessary hydration and protection your skin craves.
Let’s embark on this journey towards radiant skin!
The Basics of a Homemade Skincare Routine
Creating a successful homemade skincare routine involves understanding your skin type and its specific needs. Whether you have dry, oily, or combination skin, customizing your routine will help address your unique concerns. Here’s a step-by-step breakdown of a homemade skincare routine that can lead to glowing skin.
Step 1: Cleanse
Cleansing is the foundation of any skincare routine, removing dirt, makeup, and impurities from the skin. A clean canvas allows your other skincare products to work more effectively.
Homemade Cleansers
-
Honey Cleanser: Honey is a natural humectant, meaning it attracts moisture to the skin. It also has antibacterial properties, making it perfect for acne-prone skin. To use:
- Apply raw honey directly to your damp face.
- Gently massage it in for a minute or two.
- Rinse with warm water.
-
Milk Cleanser: Milk is rich in lactic acid, which gently exfoliates and hydrates the skin.
- Mix equal parts of milk and water and apply it to your face with a cotton ball.
- Rinse off with lukewarm water for a refreshed and clean feel.
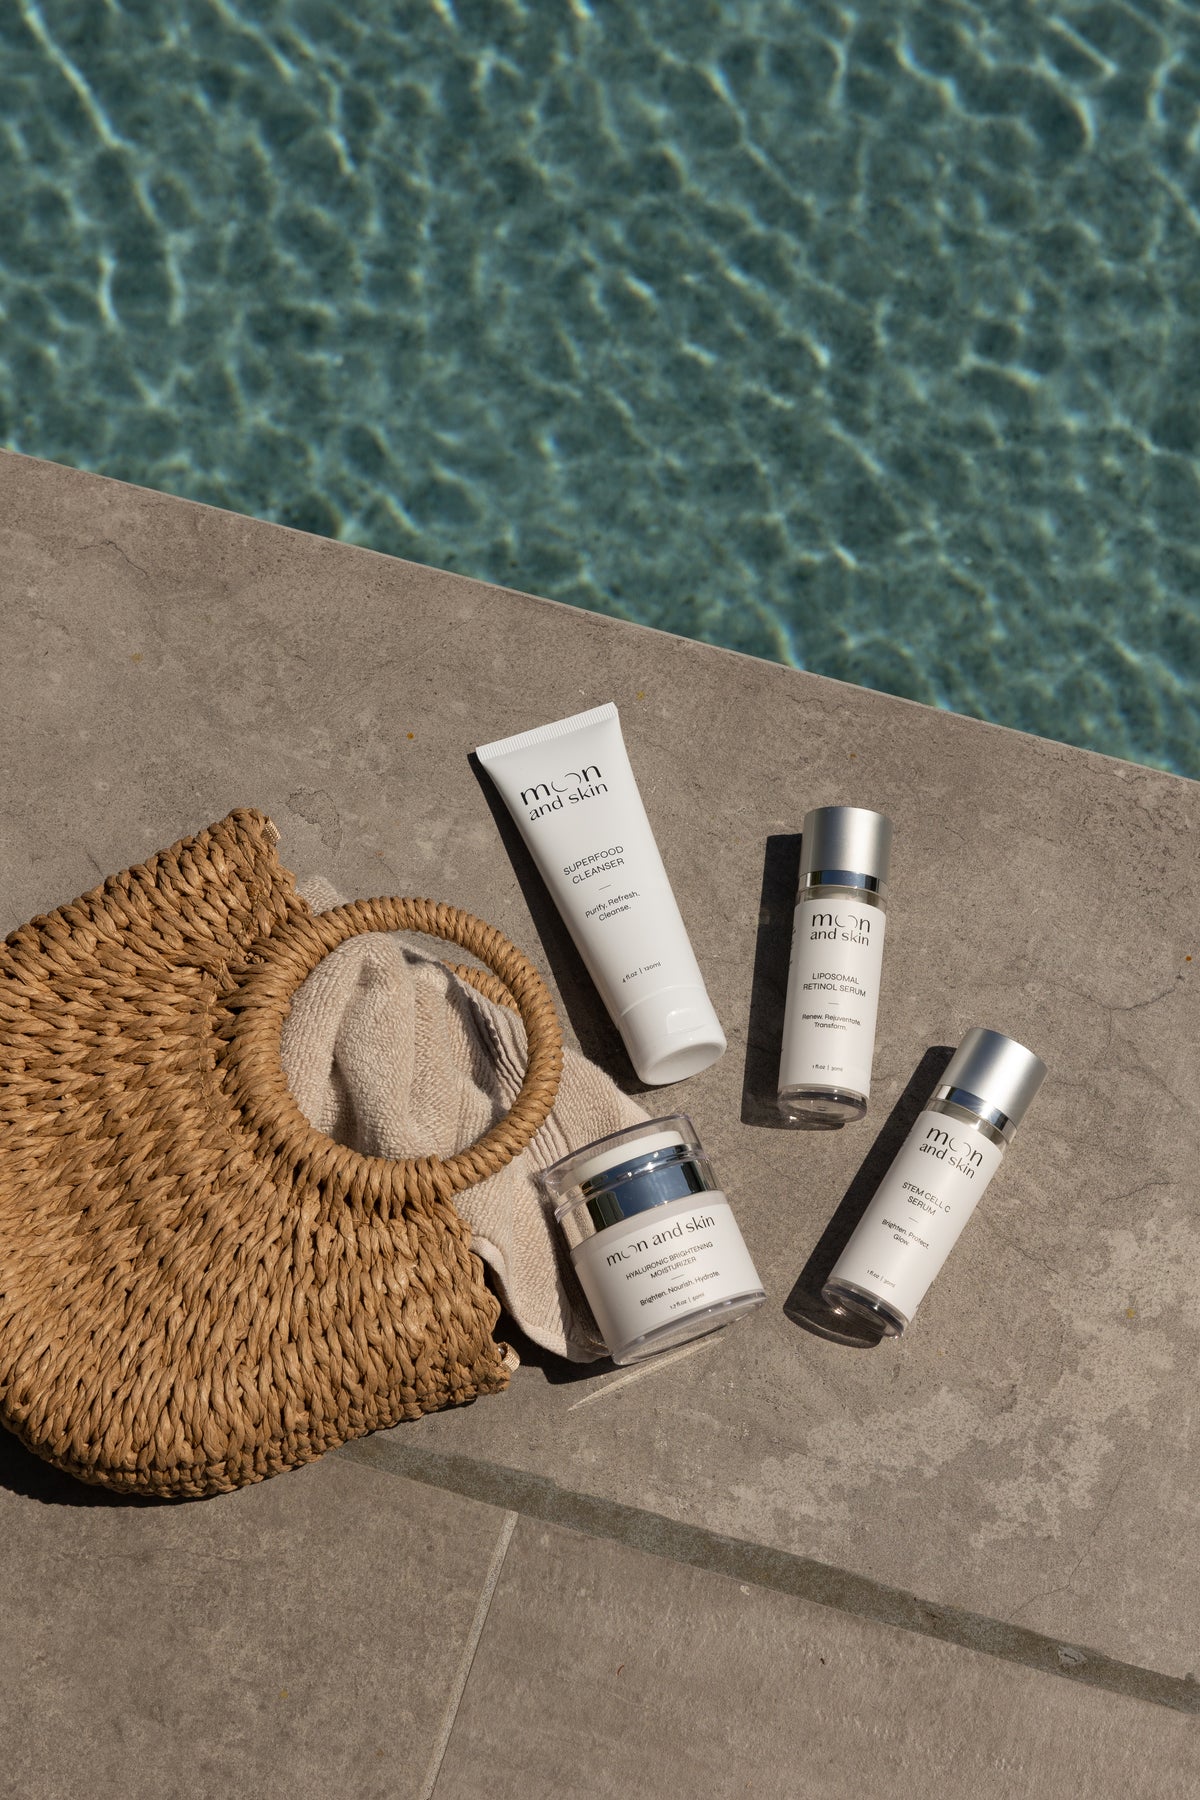
- Superfood Cleanser: For a more nourishing option, consider our Superfood Cleanser. Formulated with HydroProtein Technology, it gently cleanses while deeply nourishing your skin.
Step 2: Exfoliate
Exfoliating helps remove dead skin cells, revealing a brighter and smoother complexion. Homemade exfoliants can be made from simple kitchen ingredients.
Homemade Exfoliators
-
Sugar Scrub: Mix brown sugar with a bit of olive or coconut oil. This scrub not only exfoliates but also hydrates.
- Gently massage the scrub onto your skin in circular motions, then rinse.
-
Oatmeal Scrub: Oatmeal is great for sensitive skin.
- Mix ground oats with honey and yogurt to form a paste and apply it to your face.
- Leave it on for 10-15 minutes before rinsing.
For a more tailored exfoliation experience, our Liposomal Retinol Serum can be a fantastic addition to your routine. Powered by Centersome®RL liposomal complex, it delivers maximum results with minimal irritation—perfect for those who want the benefits of retinol without the harshness.
Step 3: Tone
Toning helps to balance your skin’s pH after cleansing while providing a refreshing boost.
Homemade Toners
-
Green Tea Toner: Green tea is packed with antioxidants.
- Brew a cup of green tea and let it cool. Apply it to your face with a cotton pad.
-
Rose Water Toner: Rose water is soothing and hydrating.
- Simply spray or dab onto your skin as needed.
Step 4: Treat
After toning, it’s time to treat any specific skin concerns with serums or targeted treatments.
Homemade Serums
-
Aloe Vera Gel: This natural hydrator can soothe irritated skin and provide moisture.
- Apply fresh aloe vera gel directly to your skin.
- Vitamin C Serum: You can create a simple serum by mixing a few drops of vitamin C powder with jojoba oil for brightening benefits.
- For a more potent option, our Stem Cell C Serum utilizes advanced plant-cell technology and a stable, acne-safe vitamin C to brighten, hydrate, and protect your skin.
Step 5: Moisturize
Moisturizing is crucial for maintaining hydrated and healthy skin.
Homemade Moisturizers
-
Coconut Oil: A fantastic natural moisturizer, coconut oil is rich in fatty acids.
- Apply a small amount to your face, especially at night.
-
Avocado Cream: Mash half an avocado and mix with a tablespoon of honey for a nourishing mask.
- Leave it on for 20 minutes before rinsing.
To round out your moisturizing routine, consider our Hyaluronic Brightening Moisturizer. It hydrates deeply while brightening the skin, making it an excellent companion to your homemade beauty hacks.
Step 6: Protect
No skincare routine is complete without sun protection. While homemade sunscreens can be tricky, you can protect your skin daily with a broad-spectrum sunscreen.
- Natural Sunscreen: Look for mineral-based options with zinc oxide or titanium dioxide.
Step 7: Customize Your Routine
Feel free to adjust and customize your skincare routine based on your skin's needs. The beauty of a homemade skincare routine is that you can tailor it to fit what works best for you!
Conclusion
Creating a homemade skincare routine for glowing skin is not only fulfilling but also empowering. By utilizing natural ingredients from your kitchen, you can effectively nourish and care for your skin without relying on harsh chemicals.
Incorporating our thoughtfully crafted products from Moon and Skin can further enhance your routine, ensuring your skin is not only clean but also deeply nourished and protected.
If you're ready to embrace the beauty of a complete skincare routine, consider exploring our Bundle & Save collection, designed to provide you with all the essentials for radiant skin at a better value. Together, let’s celebrate our unique skin journeys and achieve that glowing complexion we all desire!
FAQs
1. How often should I follow a homemade skincare routine? It's best to follow your homemade skincare routine daily, adjusting as needed based on your skin's reactions. Exfoliation should be done 1-2 times a week.
2. Can I use homemade skincare products on sensitive skin? Yes, but it's essential to do a patch test first to ensure no allergic reactions occur. Opt for gentle ingredients like oatmeal and honey.
3. What are the benefits of using natural ingredients? Natural ingredients often have fewer chemicals and preservatives, making them gentler on the skin. They also tend to be more nourishing and hydrating.
4. How long does it take to see results from a homemade skincare routine? Results can vary based on individual skin types, but consistent use of a well-rounded routine can lead to noticeable improvements within a few weeks.
5. Can I mix homemade products with commercial ones? Yes, you can combine homemade skincare with commercial products. However, ensure that the products are compatible and avoid combining too many active ingredients.
Embrace the power of natural skincare, and let’s embark on this journey to glowing skin together!